All homelab notes and experiments.

QR Check-in Auto-Printer for WordCamp PH

QR check-in auto-printer setup at WordCamp Philippines

A couple of weeks before WordCamp Philippines, Arvin John and Jhim came over to my office to co-work, flash a laptop BIOS (to remove password), and see me rehearse my upcoming talk (didn’t happen).

At some point, Jhim mentioned in passing that he wanted to try automatically printing attendee badges during QR check-in.

I happened to have a similar project for an inventory system. I knew immediately that it was possible, and I was pretty sure we could pull it off.

It got me so excited that right then and there, based on my existing project and code, I made him a proof-of-concept using a smaller printer that I have available around.

The idea was: I would expose an HTTP endpoint, and his QR check-in code would send the attendee details as GET parameters. My side would take care of the actual printing.

We had to do it this way because

  • It’s simple, it will be just a link in his QR check-in code with pre-filled GET parameters
  • No printer drivers to mess around with
  • We knew we probably would not be able to test everything together in person.

For remote testing, I exposed the printer endpoint at printernijhim.aragon.ph. Jhim could trigger a print from wherever he was, and a sticker would come out of the printer sitting in my office.

Jhim triggering print at his house.

I have been very fascinated with thermal printers and the cheapness of the sticker papers available. I was even willing to buy the printer and stickers if the organizer don’t have a budget for, just to try it out in “production”. I really need an excuse for practical use before I purchase anything.

Cost

ItemPrice
A6 Waybill Printer OC-9260₱2,399
80x50cm Thermal Label Stickers, 1000 pcs₱169
Sticker Holder₱146
Fujitsu Lifebook Q509 (tablet, printer server)₱2,199

The organizers also bought another set of printer and stickers, which is ideal in case one printer malfunctions.

The tablet doesn’t really count toward this project. I bought it a couple of months back for another purpose, on a Shopee sale. I just happened to have it lying around.

Getting it event-ready

The only thing I asked Jhim to add to his check-in system was a configurable printer URL. That way, we could change where print requests were sent without changing actual code during the event.

On my side, I used a tablet with a USB-A port connected directly to the printer.

It runs Ubuntu, CUPS, and a small web server.

I configured it so that when the tablet boots, it automatically:

  • logs in
  • starts the print server
  • opens Firefox in kiosk mode
  • waits for HTTP GET requests

The goal was for the whole thing to be basically plug and play on event day.

On the first day, I stayed around the registration area to make sure everything was working on the printer side.

On the second day, I did not have the head space to check because it’s the day I will present. It still worked.

Pulled it off for 400+ attendees

Did I mention that I’m sure it will work? It did! It was nice seeing badges around with printed tags.

Scan, check-in, badge prints. Live at registration. Video provided by Jhim.

There were a couple of things we can improve, though that’s for version 2.

Version 2

For version 2, I think the tablet itself could be the QR code scanner. It has a webcam, and it can be configured to be always-on.

We could build a small local backend where CampTix attendee data is uploaded before the event. At that point, ticket sales are mostly done anyway.

The flow could then be:

  • QR scan
  • Check-in attendee, record locally
  • Print badge

Everything entirely on the tablet. The biggest advantage is that registration would have no internet dependency at all. We could also deploy multiple tablets independent of each other (horizontal scaling!).

After the event, we could sync the check-in data back to CampTix.

For the next event!

-

The QR check-in and automatic printing idea was Jhim’s, I was just a big enabler. I just enjoy these kind of projects.

Jhim wrote up the check-in system from his side: Building a QR Check-in System for WordCamp Philippines.

Gate Watcher

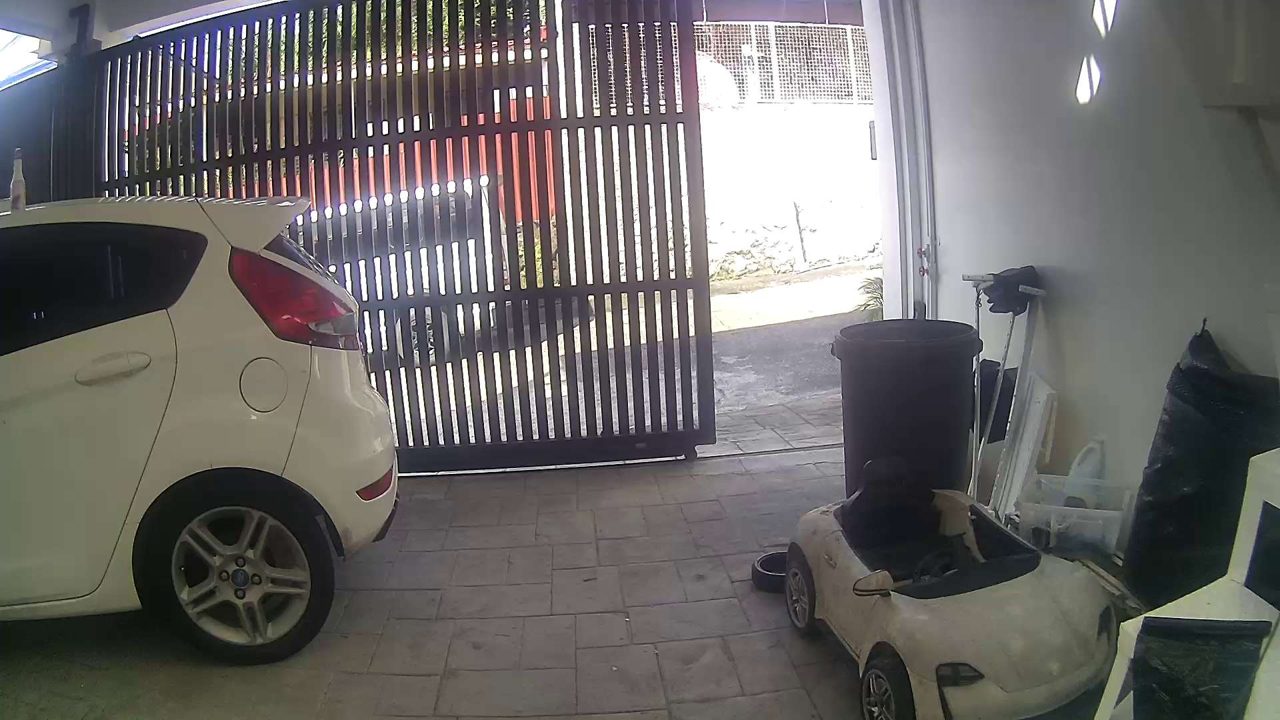
The sliding gate fully closed, slats spanning the whole opening

I have an IoT-controlled gate in my office. I can open and close it from Apple Home through Home Assistant. It’s working fine, never had a problem with it… technically.

There were two instances, though, that I somehow left it open, or open button was accidentally pressed. I only found out the next day that I left the gate opened all night. Both times, I slowly walked into the office hoping nothing was missing.

Thankfully, the two times it happened nobody took anything.

My gate setup is not smart enough that it knows the actual state of the gate (open or close).

But I have a CCTV camera pointing at the gate.

Making it smart

I’ve been looking for practical use of small models like gemma-4-e4b (supports vision!) which easily fits the GPU in my homelab server. I have it exposed via llama.cpp with llama-swap, an OpenAI-compatible endpoint, and it’s a vision model accessible to any service running in my lab.

I’ve thought of pulling a snapshot every minute and have it process the image using a prompt, then automatically close the gate if left open for 15 minutes.

How it works

Detection is one vision-model call, once a minute.

Each cycle pulls a keyframe over RTSP, crops to the lower-center of the gate, and sends the crop to the model. Temperature 0, thinking off. About a second per call.

You are looking through a carport at a sliding driveway gate, at the lower-center where the driveway meets the exit.

If you see open road/pavement/ground leading outside (gate slid away) it is OPEN.

If a solid row of vertical metal slats/bars blocks the driveway at ground level it is CLOSED.

A gate only partly open (any visible gap to the outside) also counts as OPEN.

Thin bright light-lines BETWEEN the vertical bars are still CLOSED.

When unsure, answer OPEN.

Respond with STRICT JSON only, no prose:
{"state":"OPEN"|"CLOSED","confidence":0-100,"reason":"<short>"}

“When unsure, answer OPEN” is the fail-safe. Better to have a false-positive open, than a false positive close.

The gate slid part-way open: slats on the left, a clear gap to the street on the right Even a partial gap counts as open.

The reply is JSON, so I log a state, a confidence, and a reason. One frame decides nothing. A change needs two polls in a row to agree.

Making it safe

Moving a physical gate is the part to be careful with. The alert always lands before anything moves.

  • Home Assistant pages me after the gate has been open for 15 minutes.
  • It keeps checking for the next 3 minutes. If the gate is still open for three consecutive checks, it triggers the gate to close.

There is currently no obstruction sensor. So before it closes, it takes a fresh frame and asks:

This is a driveway gate opening that is about to be auto-closed.

Is there ANY person, animal, or vehicle in or partly in the gate opening / directly in its path (anything that could be hit by a closing gate)? Be cautious.

Strict JSON: {"blocked":true|false,"what":"<short>"}

If something is blocking, it does not close.

I watched it run on its own once. After 18 minutes, the path was clear, so it closed the gate.

Making it super safe

I still have doubts about the prompt. Even if it double-checks or triple-checks it could still be wrong and cause an accident.

I already have an IR obstacle sensor that can be wired into the gate mechanism to stop it if something is in the way, I just need the time to install it.

Unfortunately, I can’t ask Claude/Codex to do it for me 😛

It’s on my to do list!

Setting up Traefik as a Reverse Proxy in Proxmox

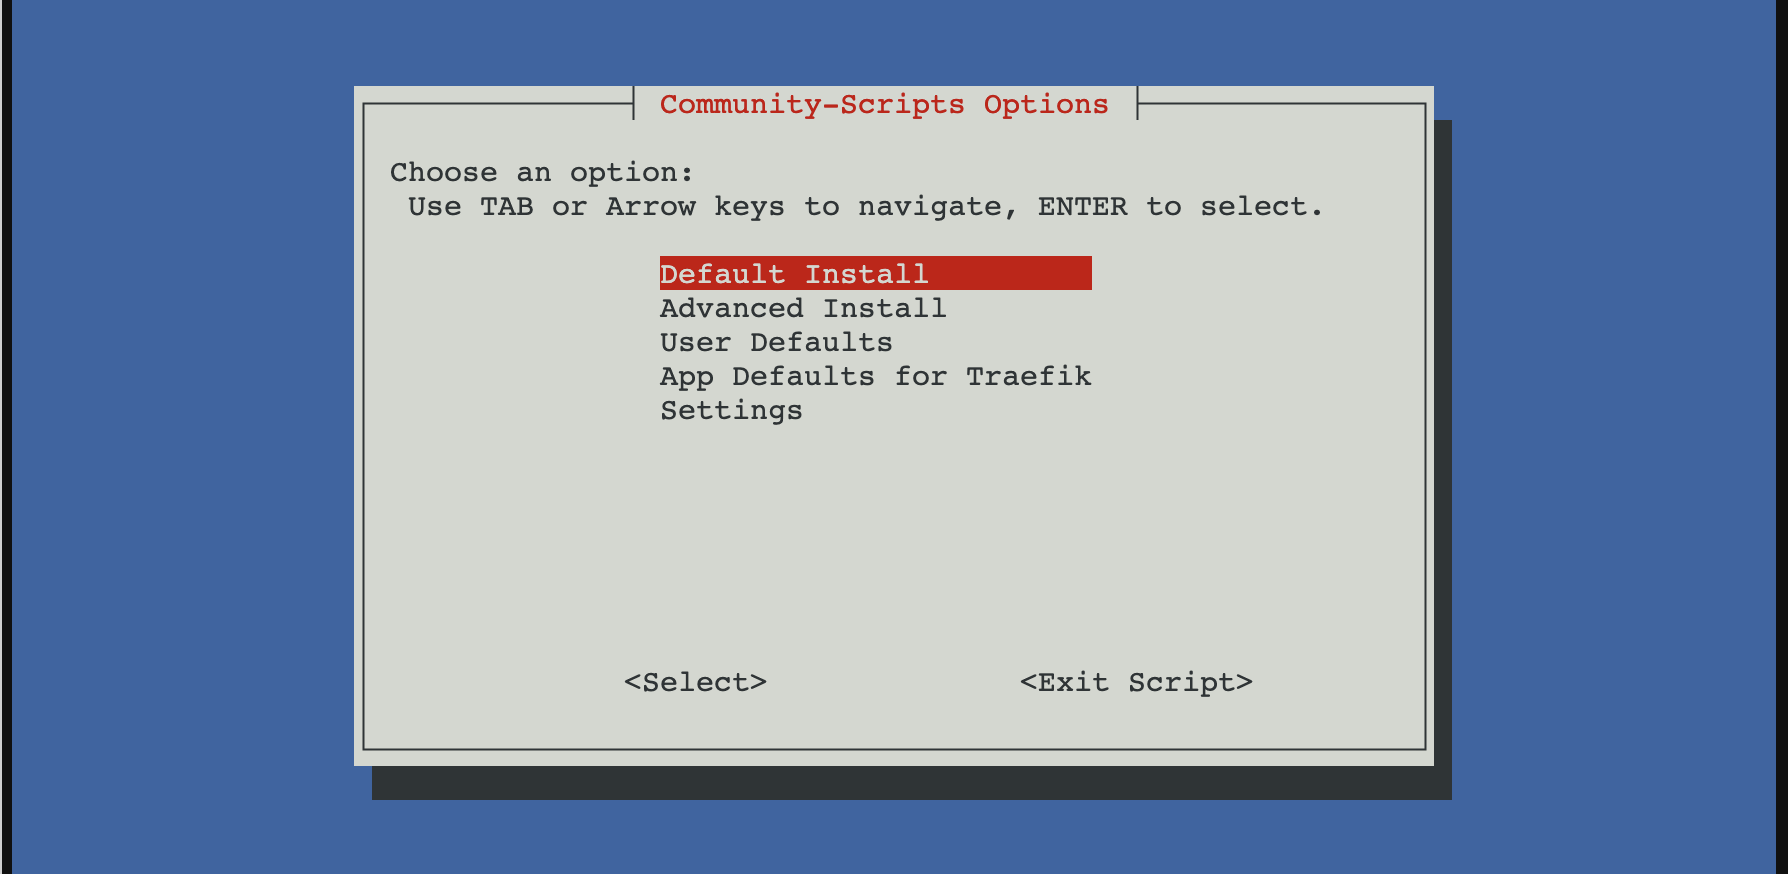
Proxmox community script options for Traefik

I wanted a simple way to run Traefik in my homelab with minimal setup friction, so I started with the Proxmox community script. It spins up a working LXC with Traefik already installed and running. I use it as a replacement for Nginx Proxy Manager and as the single entry point to every service in my homelab.

Install Traefik using the Proxmox community script

From the Proxmox host:

bash -c "$(curl -fsSL https://raw.githubusercontent.com/community-scripts/ProxmoxVE/main/ct/traefik.sh)"

After install, Traefik runs as a systemd service inside the LXC.

Static config:

/etc/traefik/traefik.yaml

Dynamic config (file provider):

/etc/traefik/conf.d/

Basic layout

I kept things simple and explicit.

  • Static config for entry points, providers, ACME
  • File provider for routers and services
  • One service per file

This makes failures obvious and debugging easier.

Entry points

No global redirects.

entryPoints:
  web:
    address: ":80"
  websecure:
    address: ":443"

Redirects are handled later using middleware.

File provider

Enabled in the static config:

providers:
  file:
    directory: /etc/traefik/conf.d/
    watch: true

Let’s Encrypt with HTTP-01

This is where most of the issues were.

certificatesResolvers:
  letsencrypt:
    acme:
      email: "you@email.com"
      storage: /etc/traefik/ssl/acme.json
      httpChallenge:
        entryPoint: web

Key points:

  • HTTP-01 must be explicitly enabled
  • Port 80 must not force-redirect to HTTPS
  • The ACME storage path must be exact

A single-character typo in the storage path caused Traefik to fail silently. acme.json stayed empty and no certificate was ever requested.

Router example

http:
  routers:
    nvr:
      rule: "Host(`nvr.example.com`)"
      entryPoints:
        - websecure
      tls:
        certResolver: letsencrypt
      service: nvr

  services:
    nvr:
      loadBalancer:
        servers:
          - url: "http://192.168.0.155:5000"

ACME only runs after a router with tls.certResolver matches an incoming HTTPS request. Nothing happens on startup.

Redirect HTTP to HTTPS properly

Do not use entryPoint-level redirects. They break ACME.

Use middleware instead:

http:
  middlewares:
    redirect-https:
      redirectScheme:
        scheme: https
        permanent: true

Apply it only to normal routers.

Logging with systemd

Traefik was running, but logs were invisible until logging was explicitly enabled.

log:
  level: DEBUG

Once enabled, journald immediately showed useful errors like:

HTTP challenge is not enabled

Without logs, this setup looks like it is working while doing nothing.

Notes

  • EntryPoint-level redirects break ACME
  • HTTP-01 must be explicitly enabled
  • Traefik fails silently on ACME storage path errors
  • Certificates are requested only after a matching HTTPS request
  • Logs are not optional when running under systemd

Once those were aligned, Let’s Encrypt issued certificates immediately.

After setting Traefik, I just need to configure my router to forward external requests to my Traefik local IP, then it will proxy the request to another service based on the domain.
Migrating from a TP-Link Managed Switch to Juniper EX2200

I hit the VLAN 1 failure pattern while migrating from a consumer TP-Link managed switch to a Juniper EX2200. The configs looked equivalent, but the behavior was not.
Consumer switches are forgiving:

  • Trunk ports behave like access ports with extras
  • “Allow all VLANs” plus PVID feels safe
  • End devices often work on trunks accidentally

On the EX2200:

  • Trunks are for VLAN-aware devices only
  • Native VLAN is not a substitute for access ports
  • VLAN 1 must not be implicitly tagged
  • Ambiguous configs are accepted but behave differently

The fix was mostly mental model. Once I treated trunks as trunk-only and made VLAN intent explicit everywhere, VLAN 1 behaved and DHCP stopped failing silently.

For the working port and VLAN patterns, see: Juniper EX2200 VLAN Reference.

Showing 4 of 56 notes